The MacBook Screenshot App That Keeps Your Captures Usable
Most MacBook screenshot apps capture the screen and then forget about it. Snapling covers the full lifecycle: capture, preserve context, make it searchable, reuse it, and share or export only when useful. This guide explains what to look for in a MacBook screenshot app and how Snapling's workflow-first approach differs from one-off capture tools.
TL;DR
Most MacBook screenshot apps capture your screen and stop there, leaving captures buried in folders as dead files. Snapling covers the full lifecycle — capture, annotate, OCR-search, organize in a visual memory library, and reuse or export only when needed — so every screenshot stays useful.
Definition
A MacBook screenshot app is a macOS utility that lets you capture, annotate, organize, search, and reuse screen content beyond simple one-off snipping.
What MacBook Screenshot App Users Actually Need
macOS ships with built-in screenshot shortcuts — Shift-Command-3, Shift-Command-4, and Shift-Command-5 — and they work fine for one-off captures. The problem starts after you press the shutter. Screenshots land on your Desktop or in a generic folder with cryptic filenames. Within weeks, you have hundreds of image files with no searchable text, no tags, and no context about why you captured them.

What most people actually need is not a better capture button — it is a system that keeps screenshots usable after the moment of capture. That means built-in organization, text search inside images, and a quick way to find and reuse a screenshot weeks later. A complete MacBook screenshot app solves the full problem, not just the first step.
What Makes a Screenshot App More Than a Snipping Tool
A snipping tool captures pixels. A screenshot workflow preserves meaning. The difference shows up the third time you reference a setting you captured last month, or when a teammate asks for a bug report screenshot from two sprints ago. Without OCR, searchable history, and context annotations, your screenshot library becomes a digital junk drawer you avoid opening.
Key capabilities that separate a workflow tool from a basic snipping app include optical character recognition for text search, screenshot history with visual browsing, long screenshot and GIF capture for dynamic content, and local-first storage that keeps sensitive captures off third-party servers. For a deeper look at Mac snipping options, see our [Snipping Tool for Mac](/guides/snipping-tool-for-mac) guide.
Core Use Cases Where One-Off Capture Falls Short
Product feedback screenshots pile up fast. A designer captures a UI inconsistency, a QA tester logs a layout bug, and a support agent grabs an error message — all within the same day. Without a shared, searchable repository, each person stores screenshots differently. The bug report vanishes into a Slack thread. The error message sits unnamed on someone's Desktop.
Research and documentation workflows suffer the same way. When you are building a tutorial, comparing competitor features, or collecting visual references, you need to retrieve specific screenshots by content — not by guessing which folder or date they might live in. One-off capture tools give you a file. A screenshot workflow gives you a retrievable asset.
How Snapling Covers the Full Screenshot Lifecycle on Mac
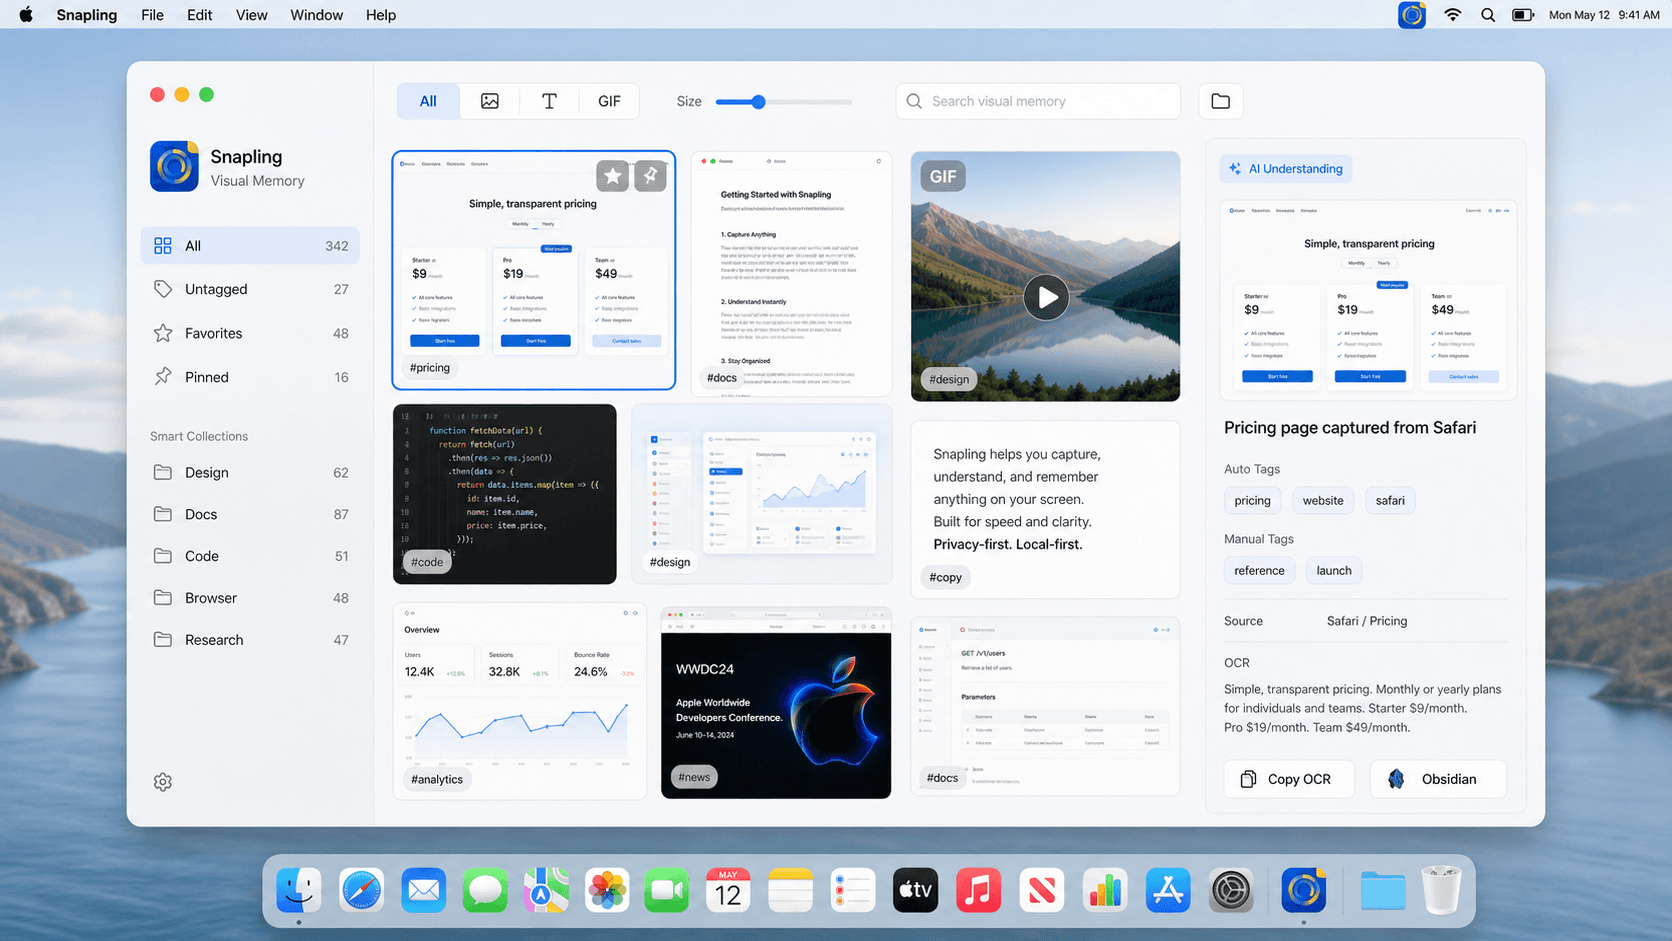
Snapling treats screenshot capture as the beginning of a workflow, not the end. When you capture a screen region, full window, or scrolling page, Snapling keeps it in a visual memory library where every image is automatically processed with OCR. That means you can search for any text that appeared on screen — error codes, menu labels, email snippets — and find the exact screenshot without remembering when you took it.
After capture, you can annotate with highlights, arrows, and text callouts to preserve why you took the screenshot. Long screenshots capture full web pages. GIF recording captures short interactions and workflows. Everything stays in your local Snapling workspace, organized and searchable, ready to reuse or export only when you actually need to send it. Explore all options on our [Snapling Features](/features) page.
Workflow Evidence — Features That Serve the Lifecycle
Screenshot history is the backbone of Snapling's reuse workflow. Instead of saving files manually, every capture appears in a browsable, chronological timeline with full-text search. This turns your Mac into a visual memory system. You can search for a password-reset screen you captured for a client three months ago, or find every screenshot where a particular API error code appeared. Our [screenshot history guide](/guides/screenshot-history-on-mac) covers setup details.
Privacy posture matters in a screenshot tool because captures often contain sensitive data — authentication tokens, personal messages, internal dashboards. Snapling stores everything locally on your Mac by default. No automatic cloud upload, no third-party processing. You choose when and what to export or share. This local-first approach means your screenshot library stays under your control for both personal privacy and team compliance needs.
When to Choose Snapling vs Built-in Shortcuts vs Other Tools
Built-in macOS shortcuts are enough if you capture fewer than a handful of screenshots per week and never need to find them later. They are free, fast, and always available. If your screenshots are truly disposable — a quick share in a message and then gone — the default tools do the job without any setup.
Choose a dedicated MacBook screenshot app like Snapling when your captures need to be retrievable, annotated, or reused over time. If you build documentation, report bugs, track visual changes, or simply want to search inside your screenshots, Snapling's lifecycle workflow replaces scattered files with a searchable visual library. Our [search and organize guide](/guides/search-and-organize-screenshots-on-mac) walks through organizing captures effectively.
Getting Started with Snapling
Download Snapling from the official site and grant the required screen recording permission in macOS System Settings. Your first capture takes seconds — use the default shortcut or the menu bar icon to select a region, window, or full screen. Your screenshot lands in the visual library immediately, already OCR-indexed and ready to search.
Spend a few minutes capturing a handful of screenshots you already have open — a settings pane, a web page, an error dialog. Then try searching for a word you know appeared on one of those screens. That first search result proves the workflow difference. From there, annotations, GIF recording, and export options become natural extensions of a capture process that no longer loses context.
Recommended next steps
Use these related Snapling guides when you want to go deeper into one part of the workflow.
Snapling Features — Core product capability page — lets readers explore the full feature set once they understand the workflow angle.
Snipping Tool for Mac with OCR, GIFs & Screenshot History — Captures the adjacent 'snipping tool' keyword intent and deepens the workflow narrative with a full guide.
How to Search and Organize Screenshots on Mac — Supports the key differentiator — searchable screenshot history — and targets the 'search screenshots' long-tail.
How to Keep Screenshot History on Mac — Directly reinforces the post-capture workflow argument and targets 'screenshot history mac' queries.
FAQ
What is the best screenshot app for MacBook?
The best screenshot app depends on your workflow. If you only need occasional captures, the built-in macOS shortcuts are sufficient. If you regularly reuse, search, or annotate screenshots, a full-lifecycle tool like Snapling — which adds OCR search, screenshot history, annotations, and local storage — keeps your captures organized and findable long after you take them.
Does macOS have a built-in screenshot app or do I need a third-party tool?
macOS includes built-in screenshot shortcuts (Shift-Command-3, Shift-Command-4, Shift-Command-5) that capture the screen and save files to your Desktop. These work for basic, one-off captures. You need a third-party MacBook screenshot app when you want features like OCR text search inside screenshots, visual screenshot history, annotations, long page captures, or GIF recording.
Can I search inside my screenshots for text on a Mac?
Yes. Screenshot apps with optical character recognition (OCR) can extract text from images and make it searchable. Snapling processes every capture with OCR automatically, so you can search for any word or phrase that appeared on screen when you took the screenshot — including error codes, menu items, and document text — without manually tagging files.
How is Snapling different from the default Mac screenshot shortcuts?
The default macOS shortcuts capture your screen and save a file. Snapling captures the screen and then keeps the screenshot in a searchable visual memory library with automatic OCR, annotations, long screenshot and GIF capture, and local-first storage. The difference is what happens after capture: Snapling makes every screenshot retrievable and reusable, while default shortcuts leave files in folders.
Is there a free MacBook screenshot app with OCR and screenshot history?
Snapling offers a free tier that includes core capture, OCR text search, screenshot history, and annotations on Mac. Most built-in Mac screenshot shortcuts are free but lack OCR and organized history. Third-party alternatives vary in pricing, but few combine local-first privacy, searchable screenshot history, and full-lifecycle capture in a single free offering.
Try the full workflow in Snapling
If you want this macbook screenshot app workflow in one Mac workspace, download Snapling for MacmacOS 13+ and try it with a screenshot you would normally need to find, copy, explain, or reuse.