How to screenshot on Mac
The fastest way to screenshot on Mac is usually a keyboard shortcut. The better long-term workflow depends on what happens after the capture: whether you need to mark it up, copy text from it, capture a scrolling page or find it again later.
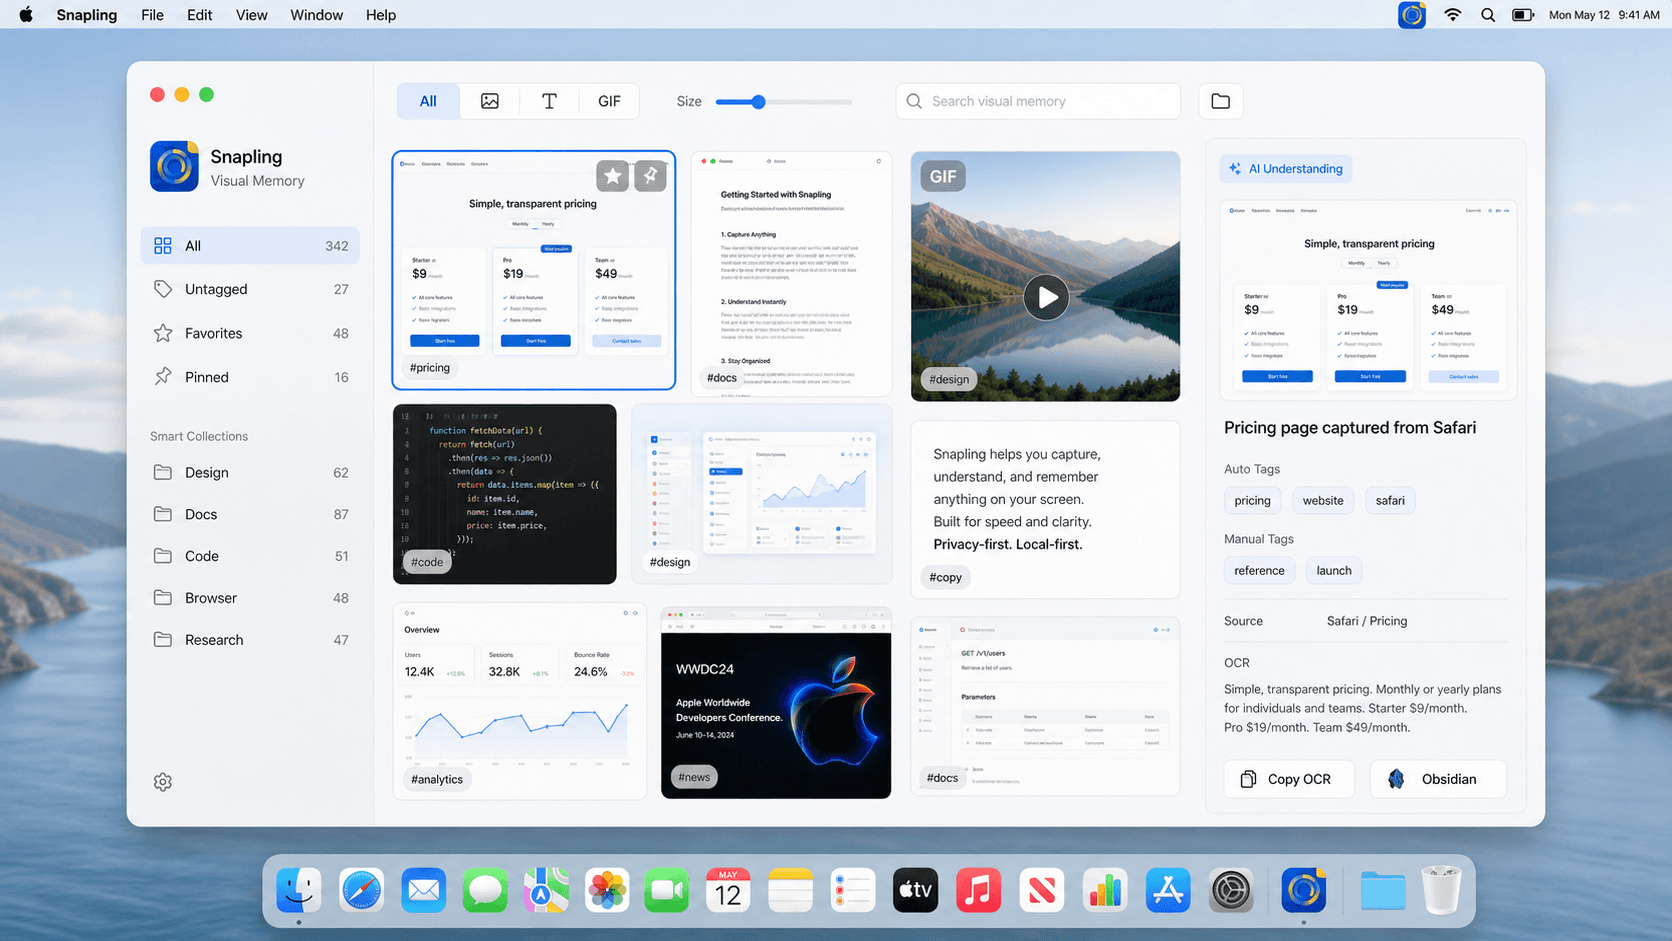
Use Shift-Command-3 for the full screen, Shift-Command-4 to snip a selected area and Shift-Command-5 for the screenshot toolbar. Use Snapling when the screenshot needs OCR, scrolling capture, GIF evidence or searchable local history.
A Mac screenshot is a captured image of your full screen, a selected area, a window or a longer visual context from macOS.
Learn the Mac screenshot shortcuts for full screen, windows and selected areas, then see when to use a snipping tool with OCR and history.
Use the built-in Mac screenshot shortcuts first
For a full-screen screenshot, press Shift-Command-3. For a selected area, press Shift-Command-4 and drag over the part of the screen you want to capture. For more choices, press Shift-Command-5 to open the macOS screenshot toolbar.
These shortcuts are the right answer when you need a quick one-off capture. They are fast, already installed and good enough for simple screenshots that you will send or paste immediately.

Choose the right capture type
Use a selected-area screenshot when you only need a small part of the interface. Use a window screenshot when the app frame matters. Use the screenshot toolbar when you want a timer, a save location or a screen recording option.
The important point is to keep the capture focused. A smaller screenshot usually communicates better than a full desktop with extra visual noise.

Know where the built-in workflow stops
The default Mac screenshot flow is not designed as a complete work system. It does not give you a strong place for long screenshots, OCR text, GIF evidence, translation, tags or a searchable history of old captures.
That is why screenshots often get lost. They start as useful context, then become files with vague names in a folder you rarely revisit.

Move to Snapling when screenshots need to become reusable
Snapling is useful when screenshots become part of product feedback, bug reports, support, research, tutorials or documentation. In those workflows, the capture is only the first step.
Use Snapling when you need to copy text from a screenshot, capture a scrolling page, record a short GIF, annotate a product issue or search old visual references from the same local-first Mac workflow.
| Task | Best default shortcut | When Snapling helps |
|---|---|---|
| Full-screen screenshot | Shift-Command-3 | When you need to annotate, tag or find it later |
| Snip a selected area | Shift-Command-4 | When the selected area needs OCR, translation or export |
| Open screenshot options | Shift-Command-5 | When screenshots, GIFs and history should live together |
| Copy text from an image | Use Live Text when available | When OCR should stay connected to the screenshot history |
| Capture a long page | No complete built-in shortcut | Use scrolling capture to keep the page in one visual record |
A few clear answers before you leave.
What is the shortcut to screenshot on Mac?
Use Shift-Command-3 for the full screen, Shift-Command-4 for a selected area and Shift-Command-5 for the macOS screenshot toolbar.
How do I snip part of the screen on Mac?
Press Shift-Command-4, drag over the area you want to capture and release. That creates a selected-area screenshot.
Where do Mac screenshots go?
By default, macOS usually saves screenshots to the Desktop, but you can change the destination from the Shift-Command-5 screenshot toolbar.
How do I copy text from a Mac screenshot?
Use OCR. Snapling keeps OCR text connected with the screenshot so the text can be copied, searched, translated and reused later.
When should I use a dedicated Mac snipping tool?
Use a dedicated tool when screenshots need OCR, scrolling capture, GIF recording, annotation, privacy or searchable history beyond the default shortcut.
Related guides
Snipping Tool for Mac
Use Snapling as a snipping tool for Mac to capture screenshots, scrolling pages, GIFs and clipboard content with OCR, annotation and private history.
Best free snipping tool for Mac: built-in vs Shottr vs Snapling
Compare free Mac snipping tools including macOS Screenshot, Shottr, Lightshot, Monosnap and Snapling for OCR, scrolling screenshots, GIFs and history.
How to copy text from screenshots on Mac
Use OCR on Mac screenshots to copy text from images and keep your screenshot workflow fast and reusable.
How to take long screenshots on Mac without messy stitching
Learn a cleaner longshot stitching Mac workflow and avoid piecing together scrolling screenshots by hand.
Go beyond the shortcut when the screenshot matters.
Snapling keeps Mac screenshots, OCR text, GIFs and old visual references in one local-first workflow.